Monday, June 30, 2014

Simple Strategies with Tanya


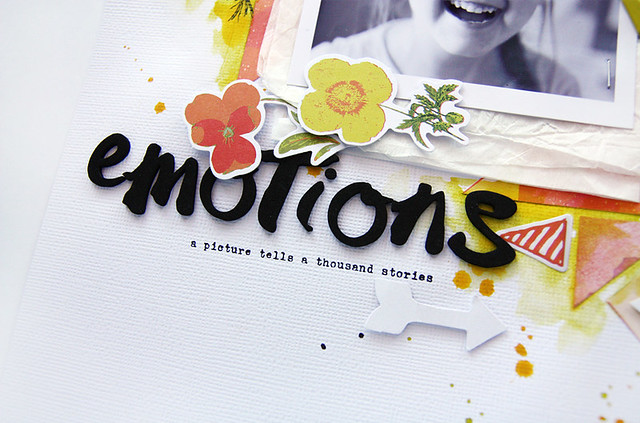
Hello and happy Monday! It´s Tanya here today to show you a simple strategy post using gorgeous June Seriously Happy Add-On Kit. Well, I have a simple strategy tip which always works for me - making you own pattern background. 

triangles_7

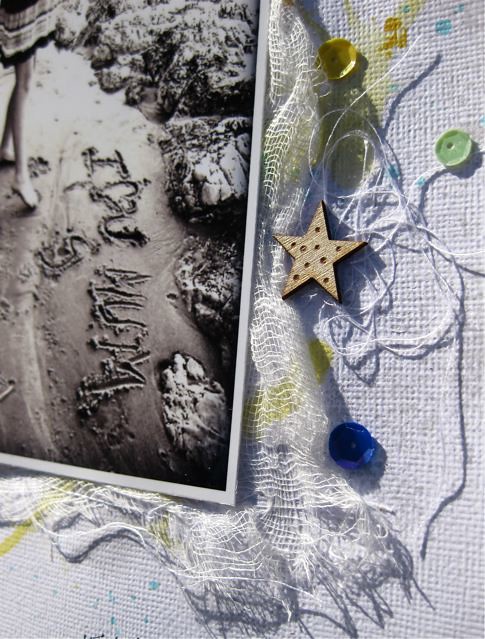
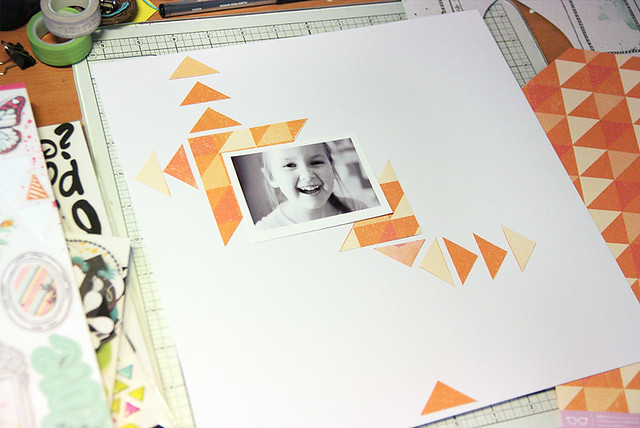
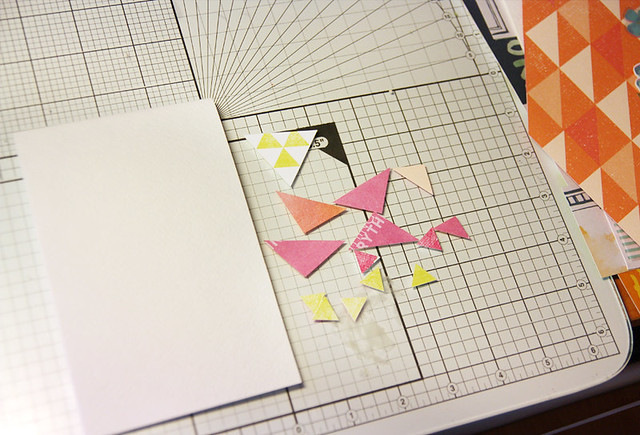
I decided to use white textured cardstock from the kit as a background 
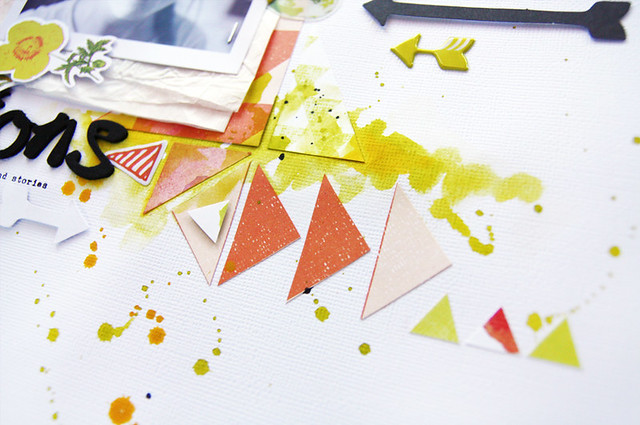
and add cut triangles to make a pattern.

triangles_3

triangles_2

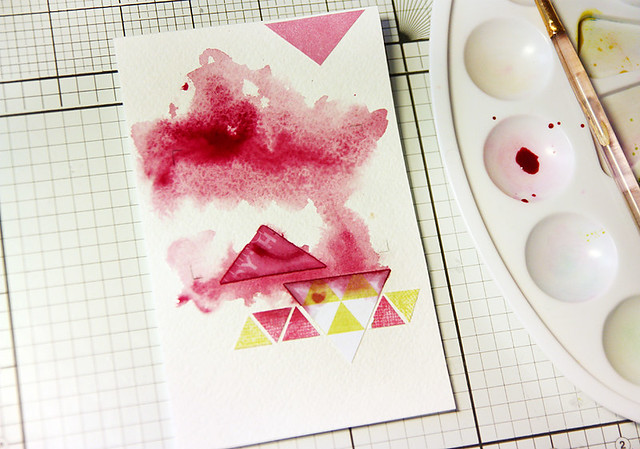
After gluing all triangles I added some yellow and green watercolour to make it look more bright and fresh.

triangles_1

triangles_6

triangles_8

triangles_5

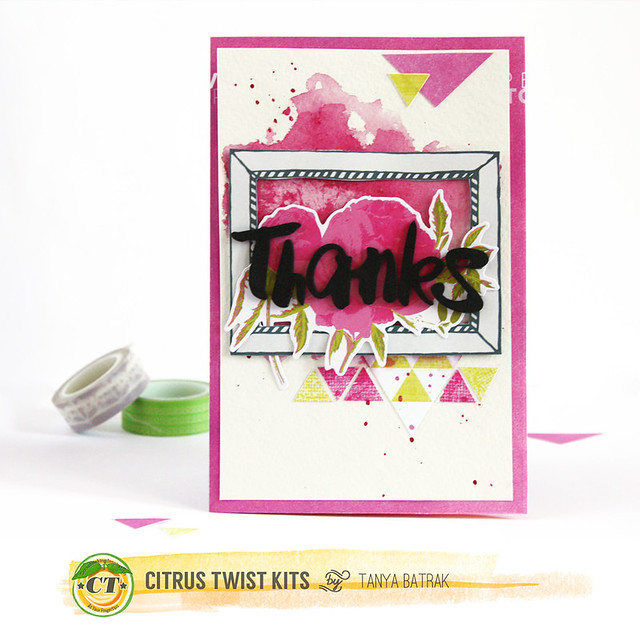
I used the same strategy to make my card - triangles plus watercolour.

triangles

I made four marks with a pencil in a place where I'm going to glue the frame before apply the watercolour.

triangles_4

triangle_card

triangle_card_1

Thanks for stopping by today! This is my last post for Citrus Twist and I want to thank you all, this was a great time :)

Sunday, June 29, 2014

Sunday Skecth

Can you believe it's the end of June??  I can't Summer is flying for me!  Here is this weeks sketch challenge!

And remember, to play along with our sketch challenge, upload your layouts to our gallery by July 5th to get your name in a drawing to win a $5 gift certificate to the CTK store. When uploading to the gallery you can name it as you would normally but please include "Sketch 6/29".


I played with this sketch using the July Kit!  I used the July Main Kit, Embellie Kit, and Paper Add-on Kit.  This kit reveals July 5th!!  Love the colors in this kit!!


Saturday, June 28, 2014

Saturday Inspiration With Sandy

For me this month is all about the pattern papers. I love the versatile selection Trina put into the June Beautiful Life Main Kit, Going Places Pattern Paper Kit and Seriously Happy Add-On Kit. I used a floral on each of my layout, pairing them with neutrals and smaller prints like the diamond or the arrow to get a different feel for each page. This first one about a local musical production is all calm and serene with it's blue-green colour palette.  

e6


Next pairing gold polka dots, toned down a ted with a vellum overlay from my stash, with black and white for a bold look. The design relies on a mixture of fonts from the oversized title to the scripted journal card and the tiny typewritten phrases - created using both the Main Kit stamp and the June Bring It On Stamp.
 
Orris (2)


Finally this more funky page about my father's birthday present where I paired a neon blue and pink floral with Pantone's color of the year - Radiant Orchid. The look is very graphic with that big photo and headline style journaling.    
 
f5
 
 
Hope you enjoy scrapping with your June kits as much as I did. Happy Summer everyone !

Thursday, June 26, 2014

Be inspired- capturing summer

Hello and happy Thursday! The summer has started and it looks like for many of us it's the best time to capture some memories on photographs! The days are longer, we are outside more often and there are just so many colors and opportunities to press our camera's shutters. Looking through the Pinterest I've found some fun ideas for summer pictures which I'd love to share with you today :)

1. Capture your favorite summer fruits!


2. Snap photos of your bare feet with cool pedi!


3. Take advantage of beautiful summer morning and afternoon light


4. Document your summer rituals and traditions


5. Have fun and be creative with your photos!


We are looking forward to seeing your beautiful summer pictures on layouts showing up in our gallery! Have a gorgeous summer!

Wednesday, June 25, 2014

6 x 6 Paper Play

Hello, Angie here to share a fun, simple layout with you.  I created this layout using the 6x6 paper pad that came in your PL Kit.  I also used the Embellie Kit and a few embellishments from the Main kit.  The background paper is from the paper add-on kit.

I simply cut stripes of paper and layed them down.  I used one of the over lays from the PL kit over my photo.  I then added some cute embellishments here and there, and I'm done.  So easy, so cute!


Here is a close up.  The thickers are from the main kit and the arrow pieces and stars are from the Embellie add-on.


Thanks for stopping!  Can't wait to see what you create using your 6x6 paper pad.

Tuesday, June 24, 2014

Tuesday Tutorial with Jen Chapin

jenchapin tut june
Hi there! Today I'm sharing a quick Silhouette tutorial with you all for making your own backgrounds.  For this layout, I wanted to make a circle grid design and I will show you how to do that with your Silhouette Software.

First, draw a circle. Pick the elliptical icon on the left side of your screen. If you hold your shift key down while dragging, it will be a perfect circle. I sized mine about 2.5"

Next you will want to repeat your design. At the top of the screen pick Object > Replicate > Fill Page.

Now your design is complete! If you don't get enough circles, go ahead and pick 'Undo' and resize your shape a little smaller and try again.

jenchapin tutorial june ctk (2)
After I adhered my die cut cardstock to the background of the layout, I used my 2" circle punch to embellish each space. jenchapin tutorial june ctk (3)
 I used the add-on stamp here which was perfect for this photo!
jenchapin tutorial june ctk (4) The June icon was perfect for punching out of one of the cards from the Pocket Life kit. jenchapin tutorial june ctk (5) Thanks so much for stopping by today, and I hope you'll try this technique soon! Let me know in the comments if you have an questions!

Monday, June 23, 2014

Simple Strategies with Gina

Hello and welcome to another simple strategies post..today I wanted to share a simple idea of using just a couple of strips of patterned paper as a top and bottom border. On this page, I've used the two South of the Market papers found in the Beautiful Life main kit. I've hand-cut a 12" strip from each sheet, then cut in half, alternating the patterns and attaching then with a couple of tiny fasteners. This idea would be perfect for using your 6x6 papers or even just one sheet of double sided patterned paper..

IMG_1478_3

For the rest of the page I've added some gauze and white cotton strands for texture, a little misting/watercolour effect, sequins, enamel dots, washi, flair and wood chip stars...

To finish, I've machine stitched through the title and layered paper embellishment and added stamping

IMG_1482_3

IMG_1481_3

Sadly, this is my last post as a Citrus Twist Design Team Member. I've decided to take a break and focus on finishing our house and garden for the next 12 months or so.. I'd like to say a big thank you to you the readers, amazing design team girls and last but not least Trina..these last two years designing with your beautiful kits have been an absolute dream!..thank you from the bottom of my heart ;) 

Take care and happy scrapping!
Gina x

Sunday, June 22, 2014

Sunday Sketch with our Guest Designer


It’s Mary Ann here with my take on the sketch challenge. When I first saw the sketch, my eye went right to the great sunburst pattern! 
 
It reminded me of the “Our Travels” paper in the kit that has a similar pattern, so that became my starting point. To make the starburst rays, I cut sections from the paper, then backed it with various patterned papers from the kit.


I added my die cut title in the same place as on the sketch, and then added all the cute star custom wood chips, the pretty blue washi tape, sequins, a few splatters of paint from my stash and the custom flair badge.


I love how a sketch can give you a starting point, and then you’re off on your own to create!

And remember, to play along with our sketch challenge, upload your layouts to our gallery by June 28th to get your name in a drawing to win a $5 gift certificate to the CTK store. When uploading to the gallery you can name it as you would normally but please include "Sketch 6/22".