Saturday, November 30, 2013

Instagram Love | November 2013

During this time of thanksgiving, the Citrus Twist team would like to express our gratitude for all of you for you support and inspiration- without you, we wouldn't be here!

We're also grateful for everyone who has helped to spread the word about us, and today we'd like to give a special shout-out to some of those who have shared their love of Citrus Twist on Instagram lately using the hashtag #citrustwistkits.

ctk instagram

These lovely images were posted by: @sarahboirin | @recrunch (Stephanie) | @hsweet12 (Heather Sweet) | @scraphappy33 | @ruthb123 (Ruth Bonser) | @briarrose86304 (Rachel Hall) | @kataroo1 (Katie Squires) | @jaimeehoward | @miri6guez (Miriam)

You can share your own photos of your kit creations with us by using the hastag #citrustwistkits, and you can also follow our own Instagram account!

Friday, November 29, 2013

Playing with Pocket Life with Sam

Happy Friday! This is Sam today to blog about my Pocket Life spread using Citrus Twist November kits. I only used November PL kit + PL embellies kit, along with some of the dies, embossing folders and gelatos from my own stash to add some texture to my PL spread.

Does adding textures and paints to your PL spreads sound intimidating (or super messy) to you? Here's my PL Week 43 with a lot of texture without making my fingers inky.

PL Week 43 1

Here's my left spread:

PL Week 43 2

Here's my right spread:

PL Week 43 3

I am loving the photo frame paper that came in the Dear Lizzy 6x6 pad. I wanted to dress up some of the frames with different patterned papers. Some I cut out the centre with my X-acto knife and some I simply add some colours with my Zebra Mildliner (pastel colour highlighter). 

PB051036

I wanted to add more pink & orange to my left spread so I painted some 3x4 white card stocks with Gelatos.

PB051037

I emboss one of the 3x4 white card stock with my embossing folders from Lifestyle Crafts. I love adding subtle texture to my journalling cards with embossing nowadays. The tags are die cut using Avery Elle's dies with coloured card stocks and Dear Lizzy papers. Can't bare to throw away the pretty twine that came with the kit so I upcycled it and tied it to one of my tags.

PB051039

Keeping my embellishments and layering pretty minimal for my recent PL spreads. Die Cut geotag is from my own stash.

PB051040

This spread showing the day we sold our old car in Singapore and gotten a new car in Malaysia.  the die cut cars and tags are from my own stash too. 

PB051041

PB051044

I love the 'Good Stuff' but it was in vertical 3x4 journalling card. So I cut it out and adhere to my 4x3 card stock.

PB051047

PB051045

I know some of you love using sketch when making PL spreads. And I am kinda hook to follow Kasia's sketches that came with the kits too! Here's my PL sketches for this week: 

Untitled

Thanks for looking! I hope this spread would inspire you to think out of the box and add some fun texture to your weekly spread. 

Thursday, November 28, 2013

Be inspired layout with Nina

Hello, Nina here today with a "be inspired" post. While I´m opening the Citrus Twist November Add-On my focus lay on the 6x6 papers. One of these papers inspired me to create a scrapbook page in a "Project Life" style because it´s originally printed in the design you see here on my layout.

I cut out the single rectangles, sew around them and place them onto a piece of white cardstock. To complete the look I add different embellishments like the beautiful fabric breads, stamp images, a twine loop (using twine from the kit´s packaging) and some Silhouette Cameo cut outs.
Here a closer look to my (German) journaling. It´s a little love letter to my husband who stays with me for more than 17 years now.
 The Studio Calico Gems who are also included in the kit matches perfect with the dot design in here.

Thank you so much for visiting the Citrus Twist blog today!

Wednesday, November 27, 2013

6x6 Paper Play with Sam

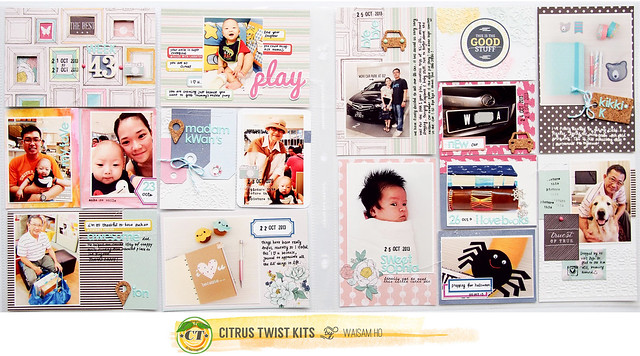
Hello there! It's Wednesday and Sam is sharing a layout - cum - project life spread using the 6x6 paper pad. Just a quick note: this month I made total 4 weeks Project Life spread + a layout using just the PL kit + PL embellies kit. Cant believe that? I only sneak in 2~3 pieces of 12x12 patterned papers, white card stocks, Thickers and gelatos  (which are my staples whenever I work on my projects) and ta-dah! 4 PL pages and 1 layout is done.

I total spent 35 minutes on this simple layout (which doesn't include the time I print and edit photo).
30 minutes - looking for the Dear Lizzy 6x6 pad
5 minutes - on a layout

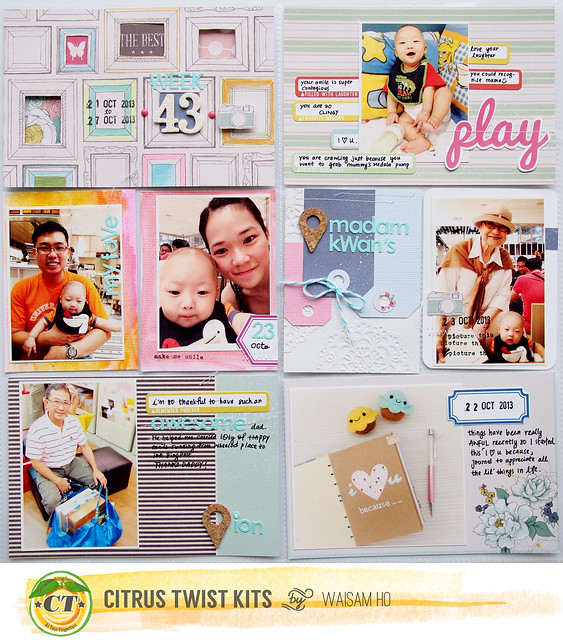
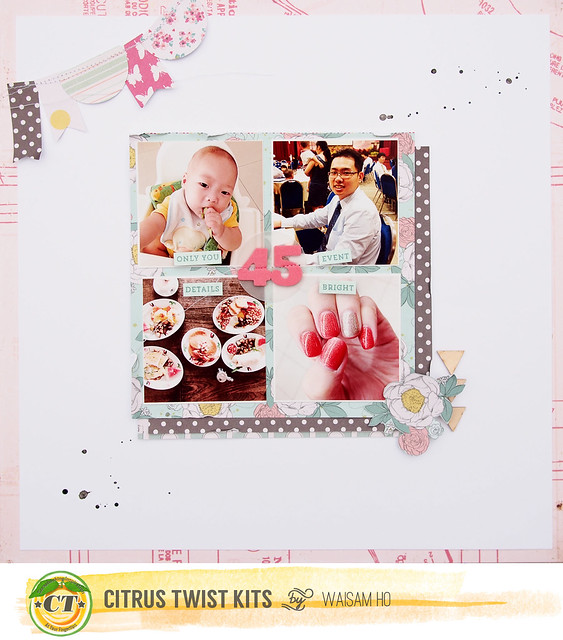
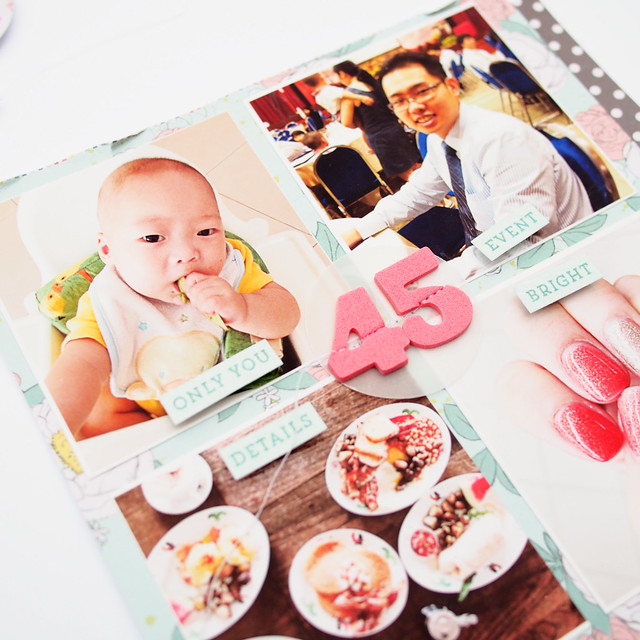
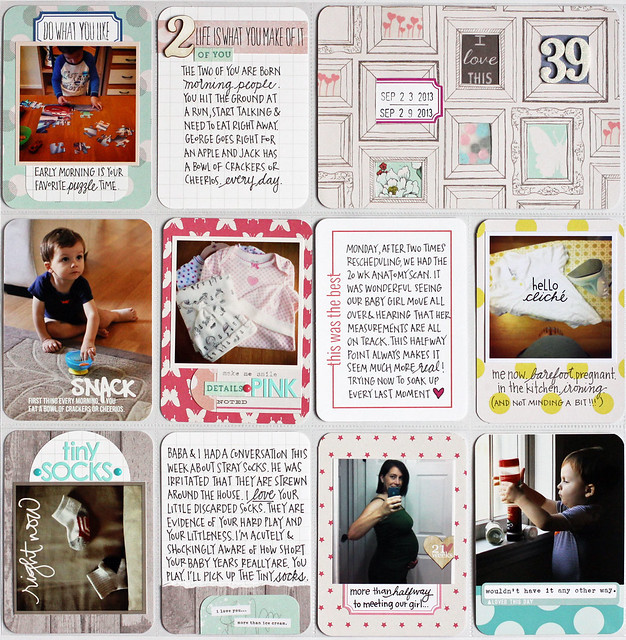
Gentle reminder to self: Keep my supplies organised so that I would spend more time scrapping than looking for stuff ;) Since I only spent 5 minutes working on the layout, I would share with you how I did it. This is actually the left page of my PL week 45.

Do go to my blog to check out the full spread. I decided to make it in a 12x12 layout this week simply because I am lazy to work on each individual pocket. Don't get me wrong. I love decorating each and every pocket but sometimes I do have time constraint in keeping my PL up to date and I found this 5-minute layout works extremely well for me.
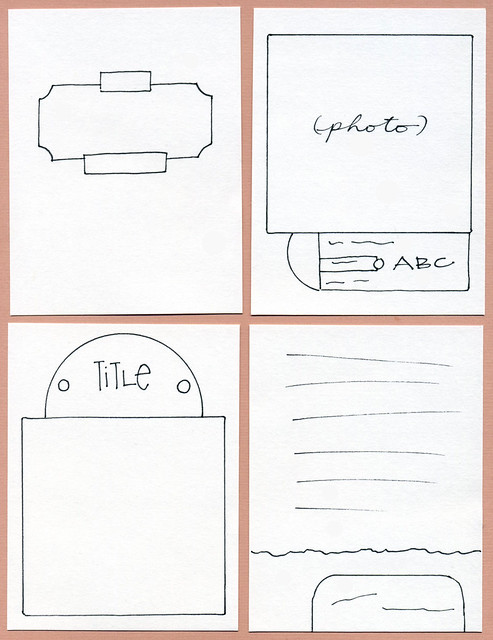
PL Week 45


Steps:
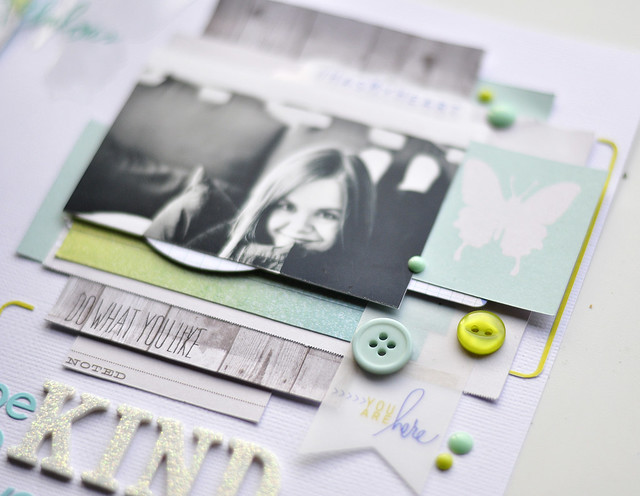
1. Print 4 photos of 2.5'x2.5'. Gotta be smaller than 3 inch each so that we could fit 4 photos on a piece of 6x6 paper.
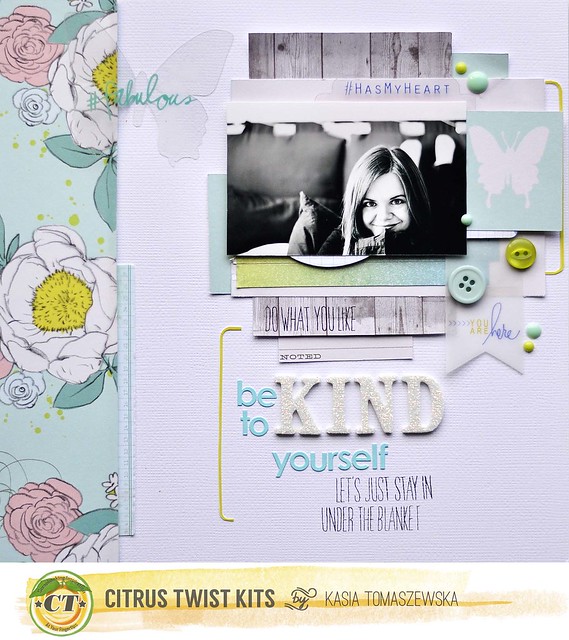
2. I just work on my routine - laying white card stock on a piece of 12x12 paper from my stash. These are my staples that I breath, eat, drink my white cardstocks. It shows how important they are to me.
3. Once background done, I tear 3 pieces of 6x6 papers from the paper pad. Ok, these ar emu last 3 pieces so I have no choice at all! *LOL*
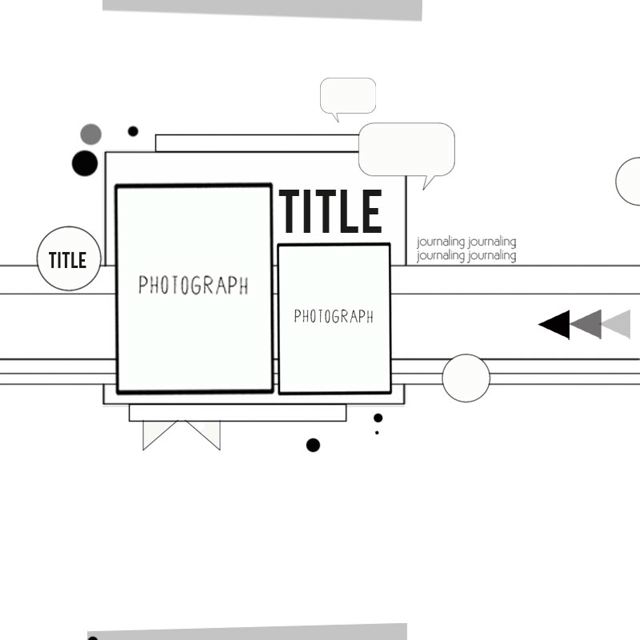
4. Layer the 3 pieces of papers as photo mat, then arrange the printed photos in grid style. You can never go wrong with a grid layout right?
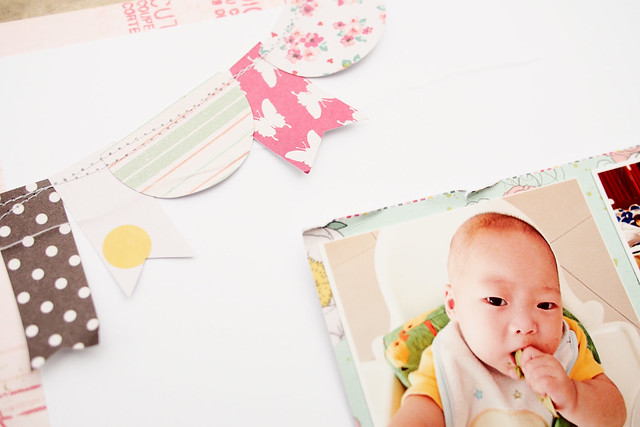
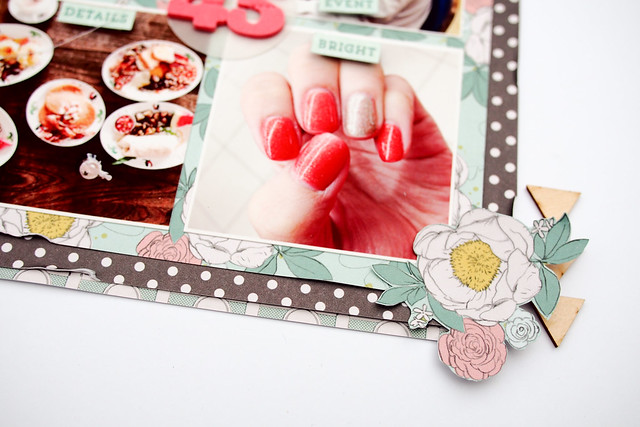
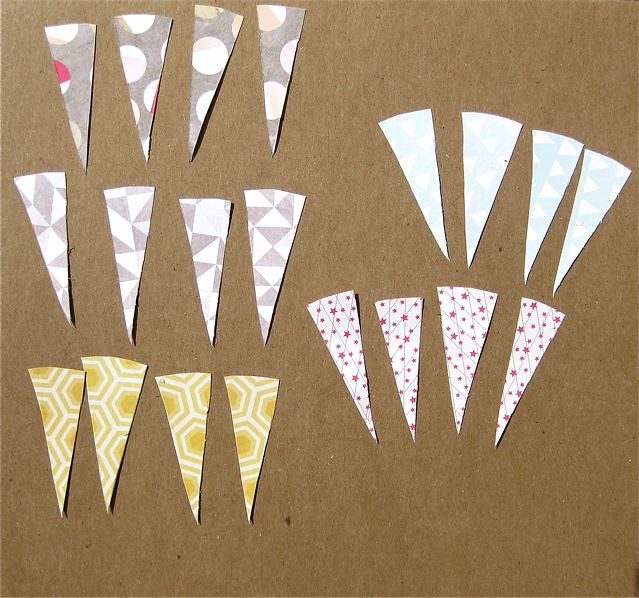
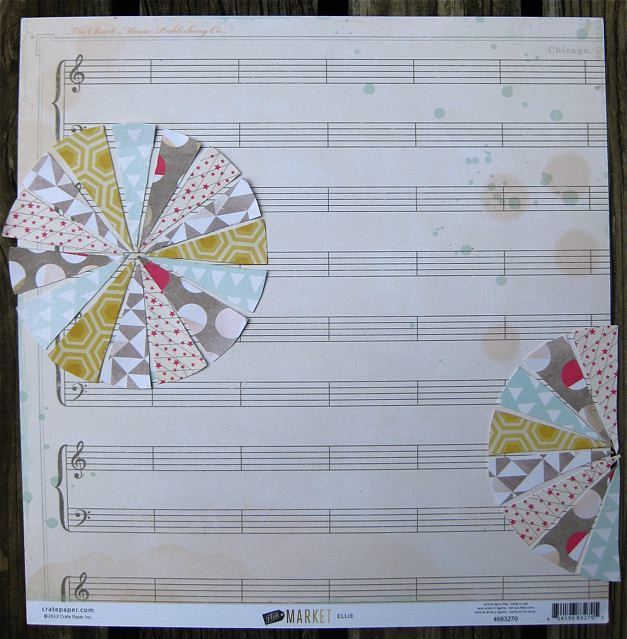
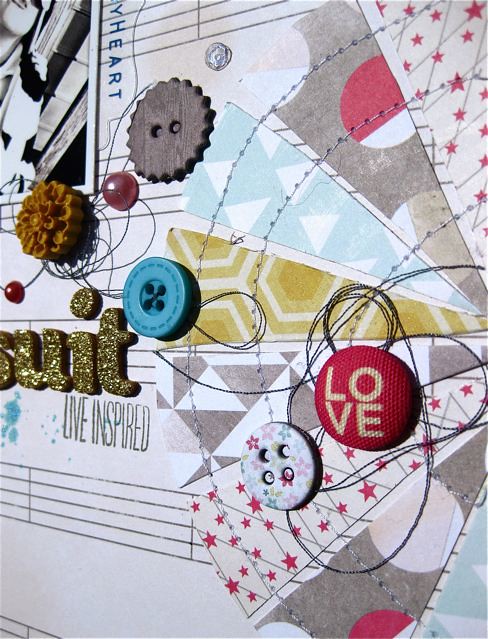
5. I didn't have much embellies on hand, so I hand cut and punch out some shapes to create my own banner. And also added a fussy cut flowers from the paper pad at the bottom right to create a cluster.
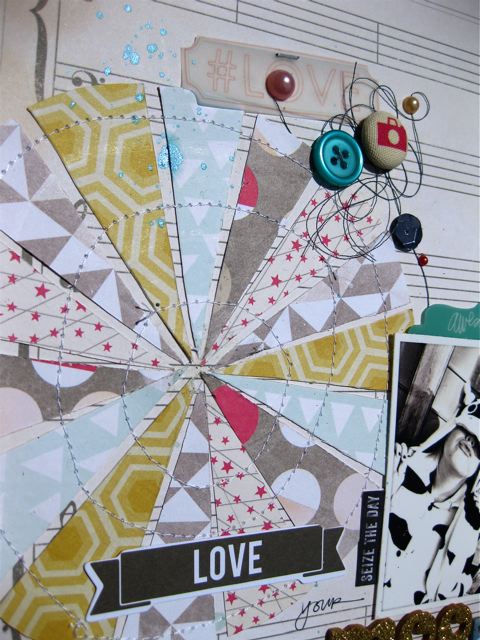
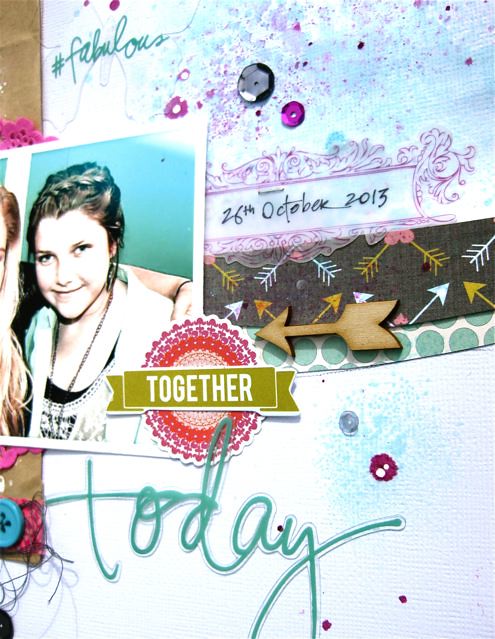
6. Can never call it done without some mist splatter right?

Note: the title '45' is from the June/July CTK kit.

PB151181


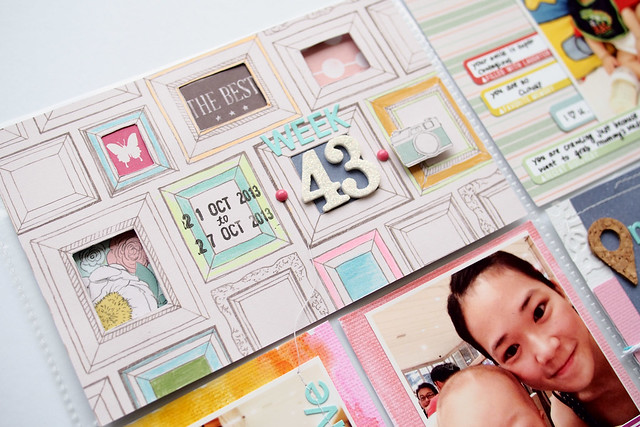
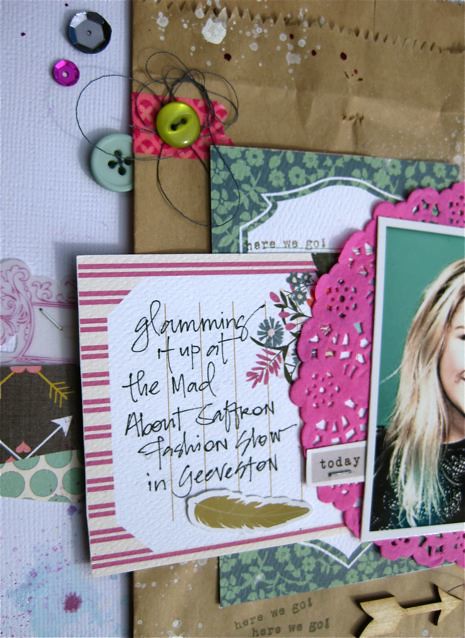
Making your own banner is always easy. Cut some square, triangles and rectangle, punch out some half-circle then stitch them down. You have your own cute little banners. Easy way to perk up any page!

PB151183

Fussy cut flowers and exclusive wood chips to create a simple cluster.

PB151184

Thanks for looking! Do share with me once you have created a 5 minute layout!

Tuesday, November 26, 2013

Tuesday Tutorial with Gina

Hi and welcome to another tutorial..today I'm going to show you how to make these fun segmented circles using a few different patterned papers. 

IMG_0270
For the circles, I've used the 8x8 "Creatve Girl" papers from the Add-On kit along with a couple of 12x12 papers but any 5 contrasting papers would be fine. Geometric designs like these look great together. I've traced around a bowl approximately 130mm (5.2 inches) and cut them out by hand.

gina_tutorial_circles


Next I drew some pencil lines starting with a cross then filling in each segment.. measurements don't need to be exact, I just did it by eye

gina_tutorial_draw

I then stacked the circles and cut them all at once. If your papers are a bit too thick, you can do this step in two lots..

gina_tutorial_cut

I've placed the circles like this.. leaving a small space between each piece and alternating the colours and patterns. You may have to trim a piece here and there to get them to fit..Once happy with the arrangement stick them down

gina_tutorial_placement

and for added texture I've machine stitched three concentric circles over each arrangement, then trimmed off the loose threads and overhanging papers..

gina_tutorial_stitch

to finish off the page, I've added a few embellishments, black thread, die cuts and stamping, a splatter of glimmer..

gina_tutorial_detail

and the lush gold glitter thickers found in the main kit!

gina_tutorial_detail2

gina_tutorial_detail1

I hope you feel like giving this a go sometime.. This will be my last post for a couple of months while I holiday in New Zealand.. I hope you have a wonderful and safe Christmas.. see you next year J 

Monday, November 25, 2013

Winners!!

We have some winners:
(Sketch winner $5 Gift Certificate)
Sketch: 10/20 michelle wedertz
Sketch: 11/3 carolec
Sketch: 11/10 ssaucier
Sketch: 11/17 barbp

Guessing Game($5 Gift Certificate):

Beautiful layout. I love how the little touches add so much extra!


Guest Designers Top 5 (win ONE of her favorite items):

I always wondered where you got the inspiration for your style and I like your answer for that....never thought of it that way -love it!!


All winner contact CitrusTwistKits@yahoo.com and put "winner" in the subject line.

Simple Strategies with Kasia

Hello Citrus Twist Kits friends! Kasia here today with a layout made with mix of products from November kits- "Darling" main kit, "Good Stories" Pocket Life kit "Stories" patterned paper kit, and some embellishments from both Pocket Life and Scrapbooking add ons.

In today's Simple Strategies let's talk about titles! It's easy to create a title with different alpha stickers but you can go a step further and mix different products for more interesting look what you can see below

BE KIND Kasia Tomaszewska

To create my title line I used 2 different alphas- the bright colored is small and simple and the other one is made of glittery foam. Mixing 2 alphabets helped me to highlight the key word in the title and to play with the design of the writing. I also added some lines stamped with this month's awesome stamps- they complete my title perfectly! 

BE KIND Kasia Tomaszewska det2

BE KIND Kasia Tomaszewska det3

If you would like to find out some more fun tricks and inspirations for creating titles (and not only!) you could check the class which we have in store this month- you won't be dissapointed! And here are some more details of the layout! 

BE KIND Kasia Tomaszewska det4

BE KIND Kasia Tomaszewska det1

Thank you for stopping by today and have a lovely start into new week! 

Sunday, November 24, 2013

Sunday Sketch with Gina

Hi everyone, I'm here with our final sketch for November, designed by Kasia..and as usual, there's a fun arrangement of papers and embellishments for you to put your own spin on..

sketch 24 Nov

here's my example..I've stuck pretty close to the sketch here, just switching the title and journaling placement around a bit and using a single landscape format photo in place of 2 photos.. I've used mostly the "Darling" main kit here along with a few buttons and stickers from the embellie kit

IMG_0258

I've used a paper bag used a kit packaging behind the photo and this could be an option for including some hidden journaling or child's drawing or a letter etc.. 

IMG_0256

I've used a couple of mists which co-ordinate with the main kit as well..

IMG_0255


I hope you get to play along with our sketch challenge...remember to upload your layout to the gallery by Saturday, November 30th to get your name in a drawing to win a $5 GC to the store. When uploading to the gallery you can name it as you would normally but please include "Sketch 11/24"

Gina x

Saturday, November 23, 2013

Saturday Inspiration ~ Card Day

Sandy celebrates with all the lovely fushia-coloured elements in the November kits. The extra item she added on her card is the #1 starburst which is from the Basic Grey Snippets available in the Citrus Twist Store.

  Favourite

Hi, Gina here sharing my card created with the main, add-on and embellie kits. The beautiful pink doily was the perfect size to add the bee from the Heidi Swapp "good life" paper and give the card a pop of colour.

gina_card

Nathalie here, this card was created with the "Darling" main kit and the "Live Inspired" stamp add-on. I loved the big flowers from the Carta Bella sticker sheet and managed to pair them with the awesome "Live inspired" stamp thanks to a very cool sketch from retrosketches.

nathalie_liveinspiredcard_CTKnov2013


Hi, here is Amélie and this is my card for November. This card is made from Main and Embellie kits. I really like soft colors of this card, lots of layering on this card too. I also decided to add on it several embellishments to draw attention. I hope you will like it. See you soon.

cartectk1

Friday, November 22, 2013

Playing with Pocket Life with Jen

Happy Friday to all! This week I am sharing my Week 39 in my yearly album. It was a week packed with activities, stories, aqua and pink. I had so much fun playing with the November PL and PL Embellishment kits!

Jen_NovPL2_1
My left page focused on things happening at home: a note about my boys being morning people, my new ironing routine for my oldest son's school uniforms, play time, collecting baby girl clothing and a note about stray socks.

Jen_NovPL2_2
The right side was about what happened outside: visits to a local nature center (aren't the floral and butterfly patterns perfect for these outdoor photos?), my 20 week anatomy scan, family breakfast at a favorite diner and a sweet quote from my oldest about his baby sister-to-be.

Jen_NovPL2_3
I absolutely loved this frame pattern and wanted to maximize its impact by using it for my weekly date card. I simply used my craft knife to cut out the inside of several of the frames and added other snips of patterns from the 6x6 pad and a glassine pocket of sequins to the back. Then, layered the kit washi tape on a few other openings, stamped my dates on a label and tucked that partially inside another frame. The finish was the 39 using the fun, glittery Thickers from the PL Embellishment kit.

Jen_NovPL2_9
The 1/2/3 exclusive wood veneers were a super fun inclusion and I wanted to make them stand out. This week, as I was writing out the conversation between my husband and son I knew the three would be a perfect accent to highlight G's age (journaling card is a printable freebie from my stash). I colored the number with a pink Sharpie pen and then added the coordinating hot pink butterfly paper to the top of the card.

Jen_NovPL2_6
And here are your PL sketches for the week. Enjoy!

Jen_NovSketches